Sample editor
The Sample Editor is a powerful tool for managing samples. It offers the following capabilities:
- Display the waveform.
- Edit the sample (available exclusively to the sample owner).
- Apply effects (available exclusively to the sample owner).
- Create cue points.

Navigation
The edited sample is displayed in two views: a zoomable window in the center and a full sample view at the bottom.
You can adjust the zoom by scrolling in either view. Additionally, you can drag and reposition the zoomable window using the full sample view.
Selection
Selecting an area is the way to play a part of the sample, apply effects, and create cue points. To help you with this task, you have access to the following selection panel:

In this panel, you have the following buttons:
| Icon | Name | Description |
|---|---|---|
 |
Clear selection | Remove the current selection. |
 |
Zero cross | Constraints the cursor to be placed on zero cross points. It affects the selection points too. |
Create a selection
Selections can be made in the zoomable window. To select an area:
- Click at the starting point of the desired selection.
- Drag your cursor to the endpoint and release.
Modify a selection
Selections can be modified in different ways:
- Drag the start or the stop cursor to change start and stop points.
- Drag from the middle of the selection to move the whole selection
To remove a selection, you can either click outside the selection or use the button Clear selection.
Commands
You have access to both playback controls and commands for modifying a sample.
Reminder: Modifications are only available for samples you own.
To play the audio
These commands are applied to the current selection. If no selection is made, the entire audio will be used.

To modify a sample
To preserve your changes, remember to save them using the save button:

The Undo and Redo buttons are related to the editions done (simple edition/effects).
!!! info "Information" If you modify a sample that is present in your WoFi, you will need to manually synchronize it (this will be improved in future releases):
- Remove the sample from your WoFi.
- Re-add the updated sample to the WoFi.
Simple sample editions
Simple sample edits are those that do not require any user-configured parameters. Below is a list of available edits:
| Icon | Command | Description |
|---|---|---|
 |
Fade In | Apply linear fade-in effect to the selected area. |
 |
Fade out | Apply linear fad-out effect to the selected area. |
 |
Crop | Crop the sample to the selected area. |
 |
Trim | Remove silence from the beginning and end of the selected area or entire signal if no selection is made. |
 |
Cut | Remove the selected area from the signal. |
Effects
Effects can be applied either to the current selection or to the entire signal if no selection is made.

Adjust the parameters as needed, then confirm to apply the effect:

Cue Points
Cue points mark specific areas of the signal that can be directly selected for playback in your WoFi, with support for up to 16 cue points. Each cue point defines the start and end of a particular area of interest.
The cue points panel has two modes:
Cue points from selection: in this mode, you can select an area of interest in the sample and transform it into cue points.

Cue points edition: allow you to modify existing cue points.

From these modes, you have access to these buttons:
| Icon | Name | Description |
|---|---|---|
 |
CP from Selection | Current mode is CP from Selection, click to switch to Cue point edition mode. |
 |
CP Edition | Current mode is Cue point edition, click to switch to CP from Selection mode. |
 |
CP Add | Create a cue point from current selection. |
 |
CP Remove | Remove the selected cue point. |
Create cue points
Being in the Cue points from selection mode, to create cue point, you have to:
- Select the area of interest.
- Click on the CP Add button.
You now have new cue points.
Edit cue points
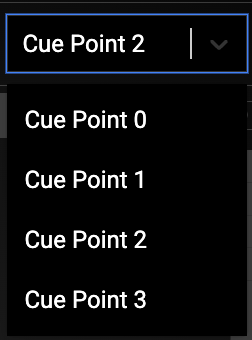
First, select the cue point to edit from either solution:
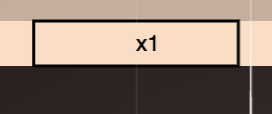
| Select the cue point to edit in the list | Select the cue point by clicking on its repeat number |
|---|---|
 |
 |
Then, edit the area given one of the following solution:
| Resize the cue point dragging its cursors | Move the cue point dragging from its center |
|---|---|
 |
 |
Preview features
!!! info "Note" These features are currently under development and are not yet implemented for your WoFi.
- Drag the repetition number up or down to adjust it.
- Drag from one cue point to another to create a daisy chain and build a progression.